EigenLayer Restaking
EigenLayer introduces a new primitive in the cryptoeconomic security space to Ethereum. Restaking enables the reuse of staked ETH tokens on the consensus layer.
Users that stake ETH natively or with liquid staked tokens (LST) can grant the EigenLayer smart contract (opt-in) to restake their ETH or LST to extend the cryptoeconomic security of Ethereum to additional applications (smart contracts such as consensus protocols, data availability layers, oracle networks, and more) on the network to earn extra rewards on that ETH.
Why Restake?
Restaking is a way for a user to make their staked assets more capital efficient. Reusing the same staked asset to further secure other networks and earn an additional yield on those assets is a compelling solution for those users who wish to pursue as much yield as they can.
Benefits of Restaking
The benefits for the user is the increased yield and enhanced capital efficiency of their asset. For the projects wishing to build as an AVS on EigenLayer, having more backed security through restaking will make their platform more robust and secure whilst allowing them to not have to worry about securing a validator set.
EigenLayer Points
Restaked Points can be viewed on the main EigenLayer page. Whilst it is still unknown what these points will translate to, a lot of users have flocked to the platform to earn points.
How to Restake
For those who prefer a visual version of this guide, we have attached our recent video guide here. The written guide continues below.
The first thing we have to do is head over to the EigenLayer frontend UI at https://app.eigenlayer.xyz/
Once on the landing page, we need to connect our Ethereum Wallet by clicking on the ‘Connect wallet’ button highlighted in the red box.
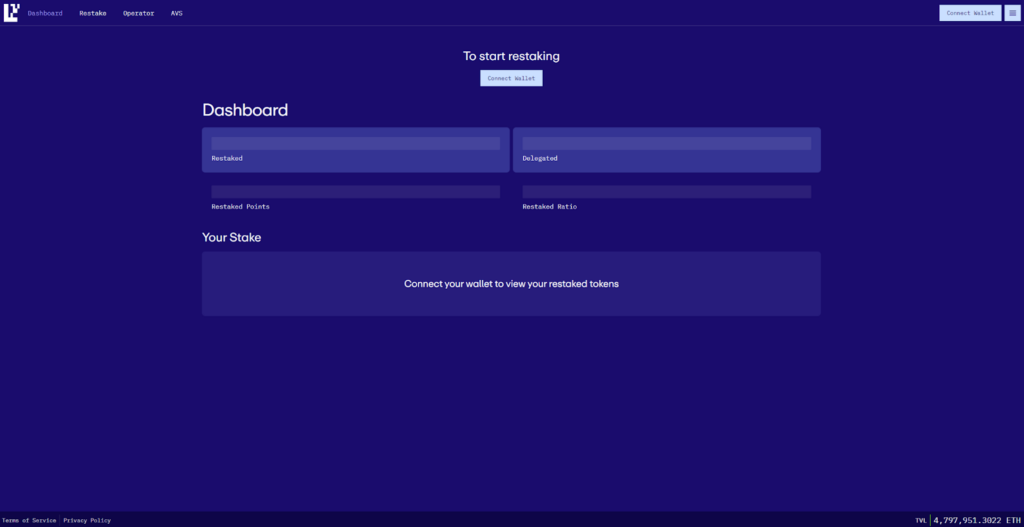
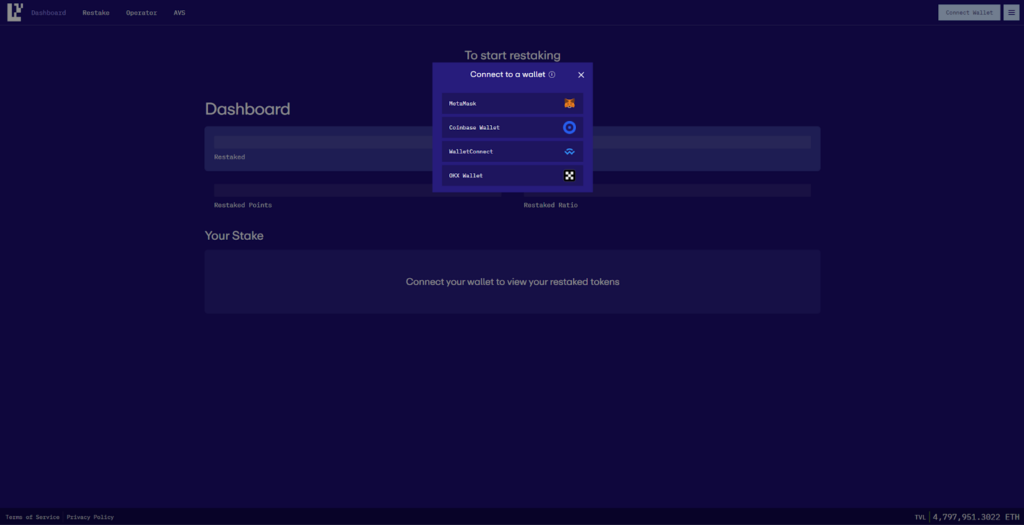
Step 1: Choosing and Connecting your Wallet
You will be asked to select your desired wallet. Currently Eigenlayer supports:
- MetaMask
- Coinbase Wallet
- WalletConnect
- OKX Wallet
Click on your desired wallet and follow the instructions to connect your wallet to EigenLayer. You may be prompted to ‘sign’ a TX proving ownership of the wallet.
Once the wallet is connected, you will be brought to the Dashboard where you will be able to see how many ‘Restaked Points’ you have alongside how much you are restaking and to which operator you are restaked.
The next step is to click on the ‘Restake’ tab on the top left of your page.
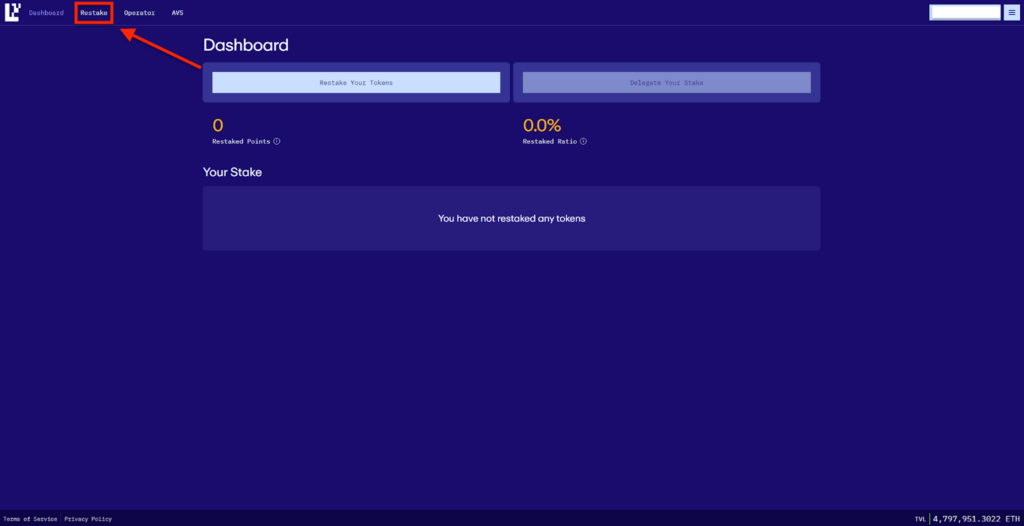
Step 2: Choosing your Restaking Asset
The ‘Restake’ page will show you all of the currently available assets that can be restaked on EigenLayer.
This list includes popular Liquid Staked Tokens such as:
- stETH (LIDO Staked Ether)
- rETH (Rocket Pool ETH)
- cbETH (Coinbase ETH)
To proceed, we need to select with LST we wish to restake with. In the case of this guide, we will restake stETH.
To begin, we click on the ‘LIDO Staked Ether’ asset on the page.
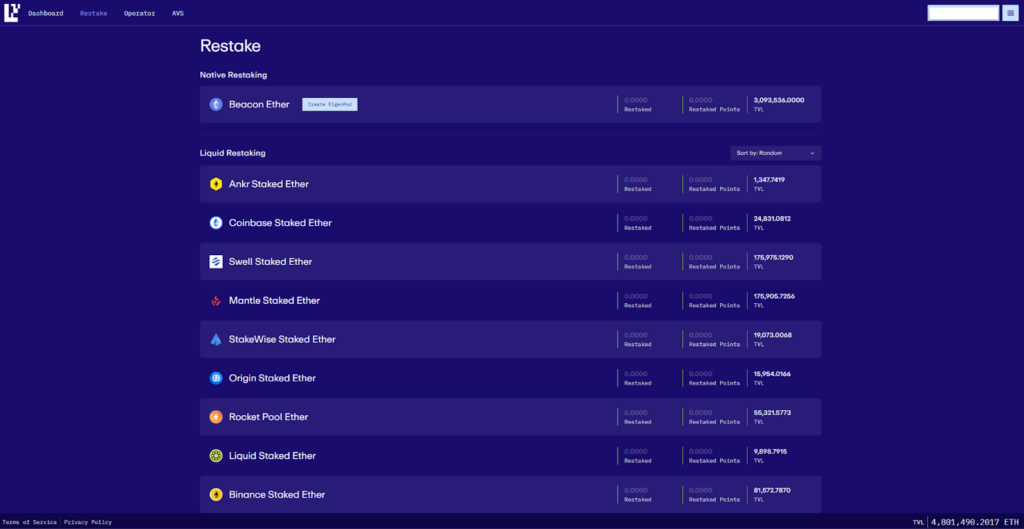
Step 3: Depositing your LST into EigenLayer
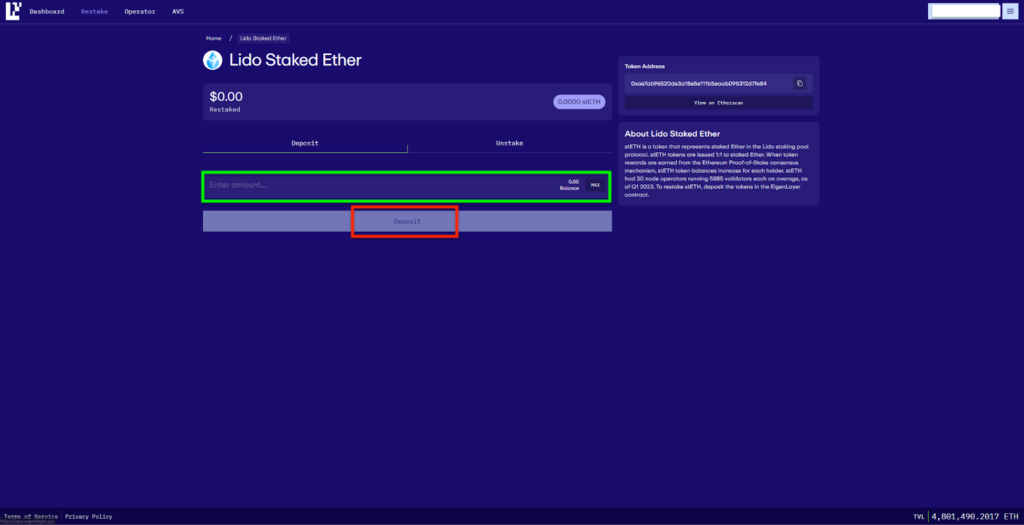
After selecting your asset, you will be taken to a dedicated page for that asset where you will be able to Deposit or Unstake that asset.
To delegate to an operator, you must deposit the asset into EigenLayer beforehand.
In the box highlighted in green, you will have to input the amount you wish to deposit and then click on the ‘Deposit’ button (highlighted in red).
You will have to approve a TX through your chosen wallet and await approval which would come up on the bottom left of the screen. Alternatively, to check if the token is successfully deposited, you can go back to the Dashboard.
Step 4: Choosing an Operator
Now that your assets are deposited into EigenLayer, it’s time to put them to work and for you to start earning points
Head over to the Operator main page by clicking on the ‘Operator’ button (highlighted in red). This page shows you all of the current Operators on EigenLayer alongside their TVL.
Each Operator has a page to show the breakdown of LSTs delegated to them alongside the AVSs they secure.
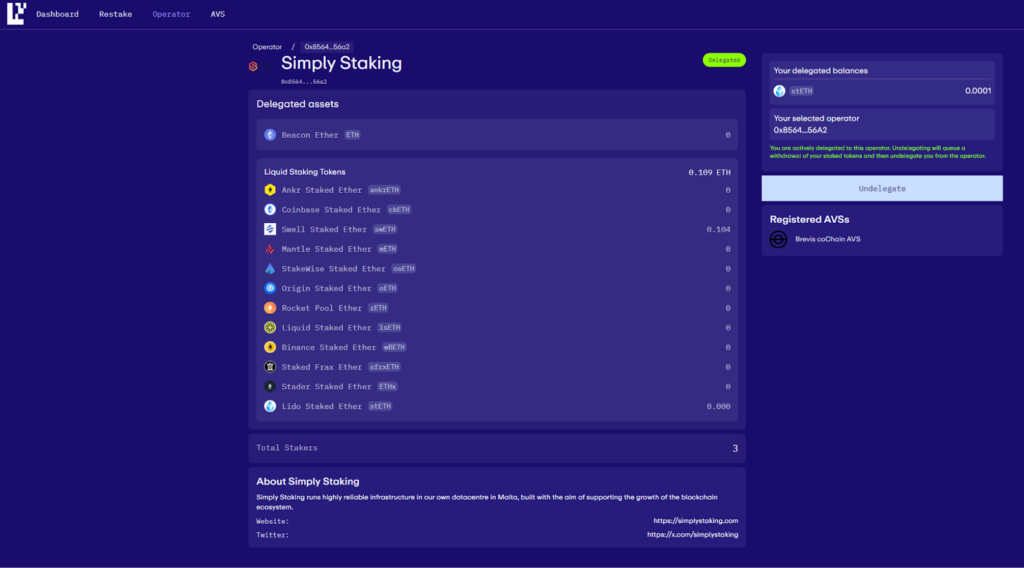
For this guide, I will show you how to Delegate to our secure and robust operator at Simply Staking.
In the search bar, start by typing out ‘Simply Staking’ and then hitting the ‘Manage’ button on the bottom right of our Operator card.

Step 5: Delegating to the Operator
Once on the page of your chosen Operator, you will be presented with the option to ‘Delegate’ on the right side of your screen.
Please note that all of your restaked balance will have to go to this operator. You currently do not have the choice to split your restaked assets across multiple operators.
Once you click the Delegate button, you will be prompted to sign a TX (or 2) to approve the assets being delegated to the operator.
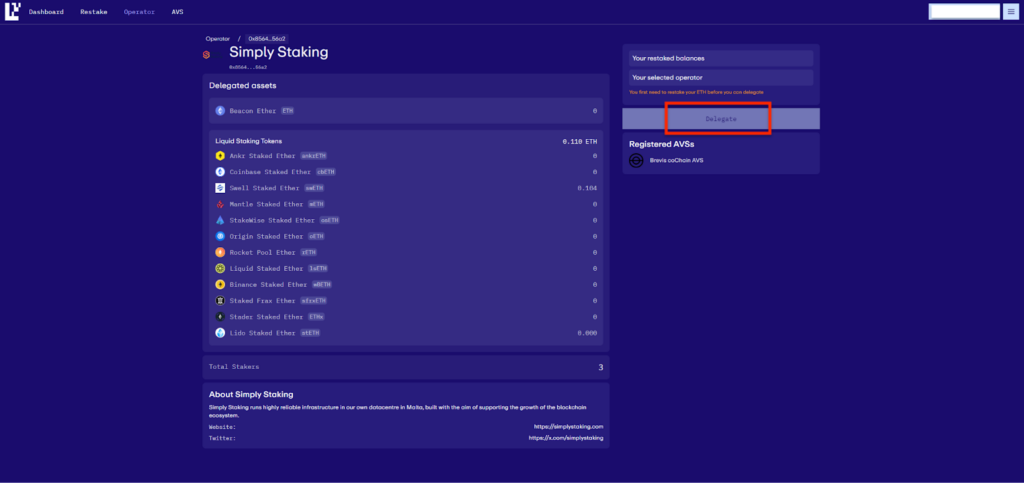
Once you have signed all of the TXs, you are now restaked with the Simply Staking Operator!
You can now rest easy knowing that we will take the most care of your assets when it comes to security and preventing slashing.
Why Restake to Simply Staking
We have been running validators since 2017 with the Cosmos Hub. We have now expanded our operations to most major ecosystems and have now accumulated over $1BN in Assets Staked with us.
We run our own hardware out of our Tier 3 data centre in Malta with backups in the Netherlands and Canada. Our DevOps and IT teams work in 24×7 rotations to ensure optimal uptime and response to security issues.
We have a strict policy to not run any of our services from the cloud.
Besides following us, you can simply stake and secure your assets with the Ledger wallet.
Disclaimer: This article contains affiliate links. If you click on these links and make a purchase, we may receive a small commission at no additional cost to you. These commissions help support our work and allow us to continue providing valuable content. Thank you for your support!
Terms & Conditions apply on all partnership offers
This article is provided for informational purposes only and is not intended as investment advice. Investing in cryptocurrencies carries significant risks and is highly speculative. The opinions and analyses presented do not reflect the official stance of any company or entity. We strongly advise consulting with a qualified financial professional before making any investment decisions. The author and publisher assume no liability for any actions taken based on the content of this article. Always conduct your own due diligence before investing.


